Expanding your WordPress website into multiple languages is a smart way to connect with a global audience. Whether you’re targeting new regions or improving accessibility, a multilingual site can open doors to wider reach and engagement.
The good news? You don’t need to be a developer or language expert to make it happen. In this guide, we’ll walk you through creating a multilingual site using TranslatePress, a powerful WordPress plugin that supports both manual and automatic translations.
🧠 What Does a Multilingual Site Do?
A multilingual website presents content in more than one language. Users can switch between versions to view the site in their preferred language—improving user experience and trust.
You’ll need to translate:
- Page content
- Product info (if using WooCommerce)
- Metadata (SEO titles and descriptions)
- Menus, image captions, and more
There are two translation methods:
- Manual Translation – You or a hired translator enter text manually for each language.
- Automatic Translation – Tools like Google Translate or DeepL generate translations for you.
Each approach has its pros and cons:
| Feature | Manual Translation | Automatic Translation |
|---|---|---|
| Accuracy | High (human review) | Medium (AI-generated) |
| Speed | Slower | Faster |
| Cost | Often higher | Often cheaper |
🔧 How to Create a Multilingual WordPress Site with TranslatePress
🔌 Step 1: Install and Activate TranslatePress
- From your WordPress dashboard, go to Plugins → Add New
- Search for TranslatePress
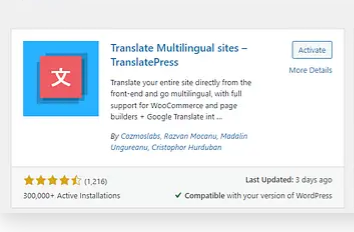
- Click Install Now, then Activate
Once activated, find the settings under Settings → TranslatePress.
🌐 Step 2: Select Your Target Language
Under the General tab:
- Keep your site’s default language (e.g., English)
- Choose the second language you’d like to add (e.g., Spanish)
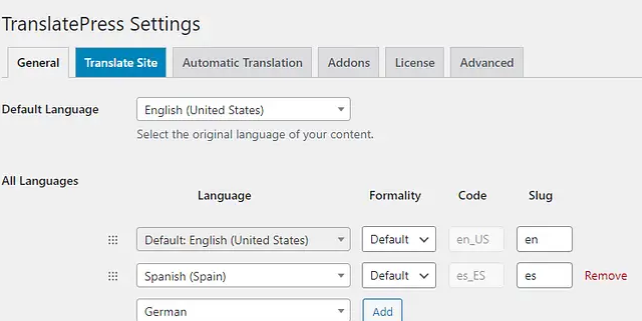
🆓 The free version lets you add one additional language. To add more, you’ll need to upgrade.
You can also set locale preferences (e.g., Spanish – Mexico vs. Spanish – Spain).
Click Save Changes when done.
⚙️ Step 3: (Optional) Enable Automatic Translation
To automate the process:
- Head to the Automatic Translation tab
- Enable the feature via dropdown
- Choose your engine (Google Translate or DeepL)
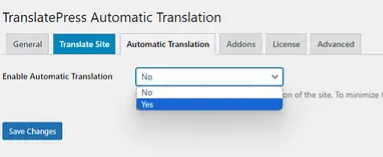
For Google Translate, you’ll need a valid API key from your Google Cloud Console. TranslatePress provides clear instructions to guide you through setup.
If you’re on the Pro version, you can:
- Use DeepL for more accurate results
- Translate SEO slugs, page URLs, and more
- Limit daily translated characters to manage cost
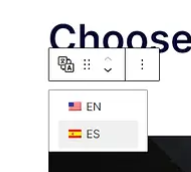
🎌 Step 4: Set Up the Language Switcher
By default, TranslatePress adds a floating switcher to the bottom-right corner of your website. But you can fully customize this!
Navigate to:
Settings → TranslatePress → General tab → Language Switcher section
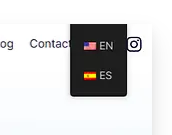
Options include:
- Display flags only, names only, or both
- Choose short (EN, ES) or full names (English, Español)
- Set position: menu, widget, footer, or floating

To manually place the switcher, you can also use:
[language-switcher]
Or use the Language Switcher block in the Gutenberg editor.
✍️ Step 5: Start Translating Your Content
Now the fun begins!
- Visit any page on your site
- In the admin top bar, click Translate Page
You’ll be taken to a live preview editor. From there:
- Select your target language in the dropdown
- Click on any visible element on the page
- Add the translated version manually in the field provided
- Hit Save to apply your change
If automatic translation is enabled, the fields may already be pre-filled for you—review and edit as needed.
You can translate:
- Page titles and paragraphs
- Menu items and buttons
- Image alt texts and captions
- Post metadata (with the SEO Pack add-on)
Repeat the process for each page or post. Want to translate blog articles? Open the post, click Translate Page, and go through the same steps.
💼 Bonus: SEO Translation (With Pro Version)
To fully optimize your site for multilingual SEO:
- Enable the SEO Pack add-on (Pro users only)
- Translate SEO titles, meta descriptions, and URLs
- Improve visibility in international search results
🚀 Ready to Go Multilingual?
Creating a WordPress multilingual site is easier than ever. Whether you translate manually or use tools like Google Translate or ChatGPT, plugins like TranslatePress make it simple and visual.
📝 Recap:
- Install TranslatePress
- Select your additional language(s)
- Enable automatic translation (optional)
- Customize the language switcher
- Translate your site’s content using the visual editor
Want more options? Explore our [top translation plugin comparison guide] for alternatives to TranslatePress.
❓Need Help?
Have questions about multilingual WordPress setups? Drop them in the comments, and we’ll be happy to assist.
Learn more


0 Comments