
Whether you’re running a charity, nonprofit, or personal fundraiser, accepting donations through your website is crucial. And if your site is powered by WordPress, you’ve got some excellent tools at your fingertips—especially when it comes to integrating Stripe.
The method below is both simple and affordable (as in, free with a catch). Best of all, it doesn’t skimp on features. With WP Full Pay, you’ll be up and running with customizable, professional-looking Stripe donation forms in no time.
What You’ll Need
To follow along with this tutorial, make sure you have:
- Access to your WordPress site
- A Stripe account (free to create)
- The WP Full Pay plugin
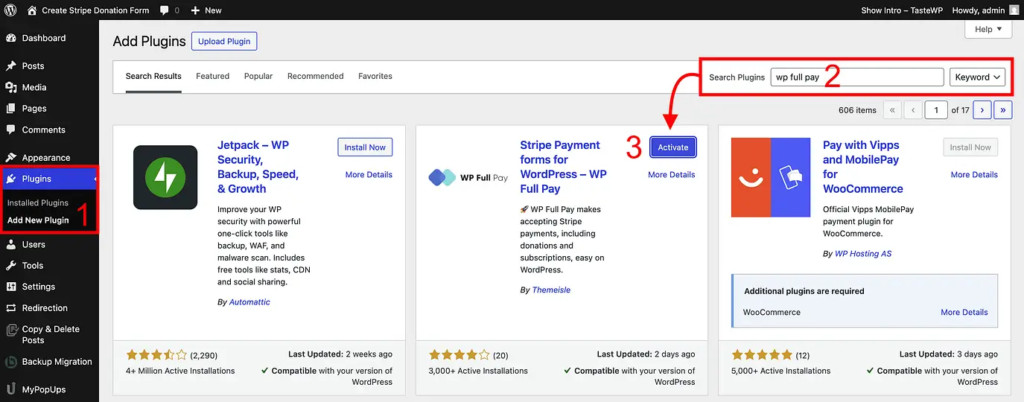
Step 1: Install and Activate the WP Full Pay Plugin
Start by logging into your WordPress dashboard. From the left-hand menu, go to Plugins → Add New, and search for WP Full Pay. Once it appears, click Install Now, then Activate.
⚖️ Disclaimer: WP Full Pay is developed by a team employed by WPShout’s parent company. The plugin offers both free and paid versions. The free version includes all features, but adds a 5% fee per transaction, in addition to Stripe’s regular fees. The paid version (starting at €79.50/year) eliminates that extra charge.
If you’re just starting out or testing your fundraising potential, the free plan is a great way to launch without risk. Once donations pick up, upgrading could save you money on transaction fees.
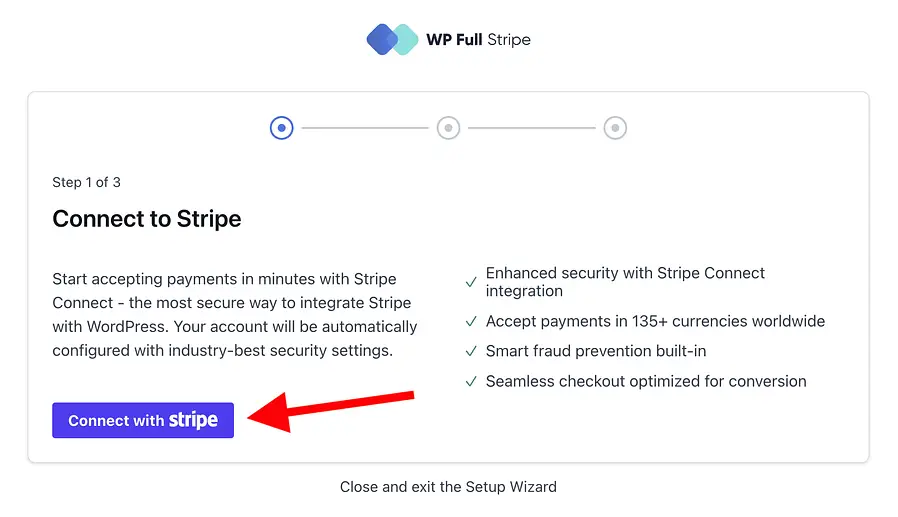
Step 2: Connect WP Full Pay to Stripe
Once activated, WP Full Pay will prompt you to connect your Stripe account. If you already have one, the process is quick. If not, you’ll need to create one and provide organization details for verification.
📝 Pro tip: Have your legal info ready—Stripe requires things like business details, banking info, and identification. It might feel tedious, but it’s standard for secure financial integrations.
If you’re working with a team, you can skip this for now and come back later. Just note that the donation form won’t be functional until Stripe is connected.
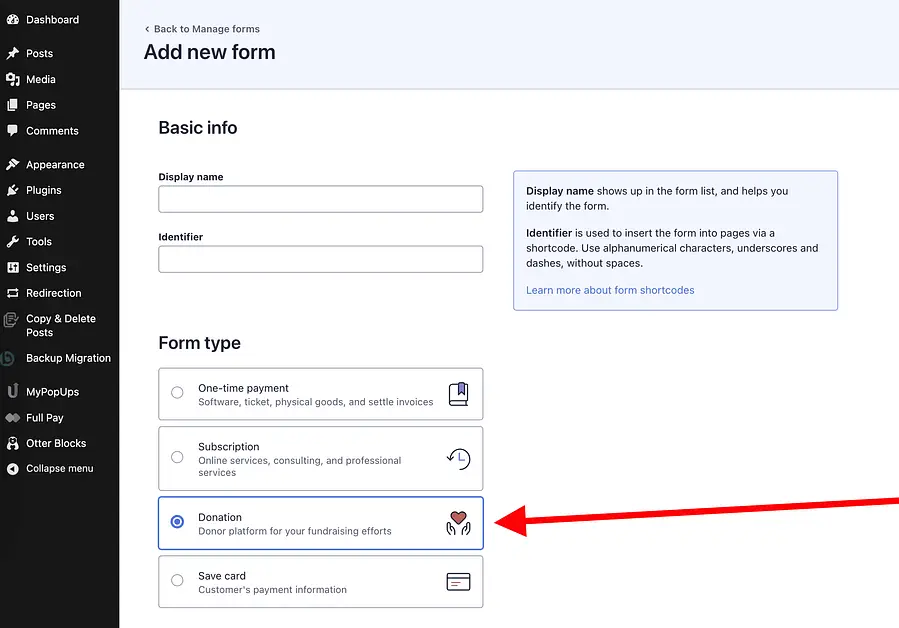
Step 3: Create Your Donation Form
To start building your form, go to WP Full Pay → Payment Forms → Add Form from your WordPress dashboard.
Name and Form Type
- Give your form a name.
- The plugin will auto-fill an Identifier based on your name. Feel free to customize it (e.g., “donate” or “donate2025”).
- Choose your Form type and layout:
- Checkout: Redirects donors to Stripe’s secure hosted page
- Inline: Keeps donors on your site for the full process
For this guide, we’re going with the Checkout layout, but both work well depending on your style and goals.
Step 4: Configure Payment Options
In the Payment tab, set:
- Your preferred currency
- Suggested donation amounts (e.g., $10, $25, $100)
- Whether users can enter a custom donation
- Donation frequency (one-time or recurring)
💡 Boost conversions by showing impact next to each donation tier.
For example: “$50 = meals for five families.”

You can also choose whether to generate invoices for each donation.

Step 5: Customize the Appearance
Head to the Appearance tab to fine-tune your form:
- Change the button text (e.g., “Donate {{amount}}” for clarity)
- Add a compelling product name and description
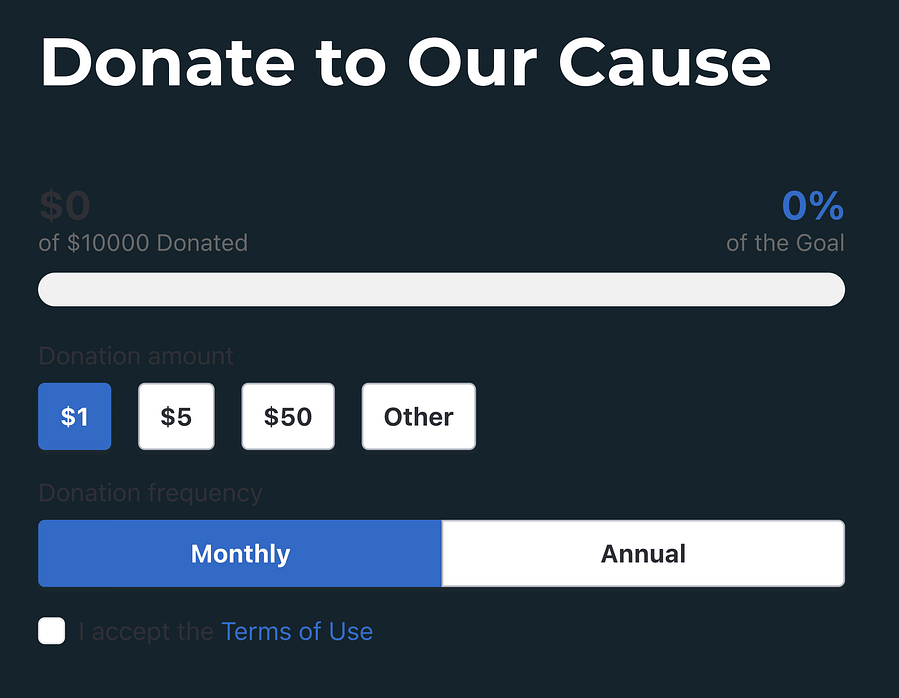
- Enable the progress bar to show donation goals
- Adjust locale settings for regional formatting
⚡️ Power move: Enabling the donation goal bar adds urgency and encourages action, just like major fundraising platforms.
Step 6: Add Optional Fields
In the Form Fields section, you can:
- Collect additional donor details (e.g., billing address, phone number)
- Add a Terms of Service checkbox to build trust and stay compliant
- Use custom fields for specific data needs
Step 7: Enable Email Notifications
Under the Email Notifications tab, you can send donation receipts automatically—either via Stripe, WP Full Pay, or both.
For most users, one method is enough, but having both ensures coverage for all scenarios. You’ll also see a Webhooks tab, but unless you’re a developer, you can skip this.
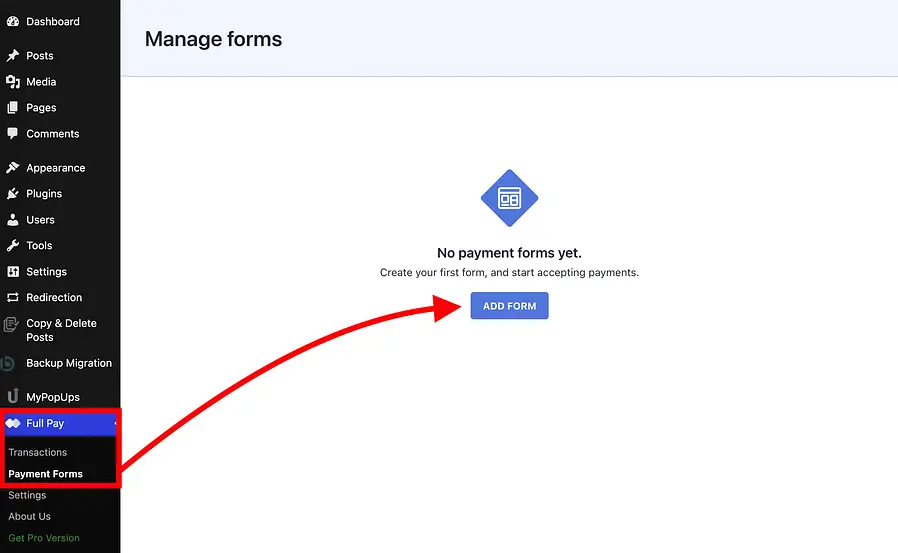
Step 8: Add the Form to Your Site
Once everything is set, hit Save Changes. You’ll be redirected to the Manage Forms screen.
From there:
- Copy the form’s shortcode (it copies to your clipboard automatically).
- Go to Pages → All Pages (or Posts if preferred).
- Edit the page where you want the form to appear.
- Click the + button in the block editor and search for Shortcode.
- Paste in the shortcode and preview the page.
If it looks good, click Save or Publish.
Bonus: Watch It in Action
Prefer to watch a video? Check out this tutorial that walks through the full process, step-by-step:
🎥 Watch the Stripe Integration Demo
Design Note: Dark Mode Caution
If your WordPress theme uses a dark background, some text in the donation form may be hard to read. You can fix this with a bit of CSS. Here’s a knowledge base article that walks you through customizing form colors.
Final Thoughts and Best Practices
The WP Full Pay plugin is beginner-friendly yet surprisingly powerful. Whether you’re launching a weekend fundraiser or managing ongoing donations, it scales with your needs.
✅ Before going live, test your form thoroughly. Make a few test donations to ensure everything—from Stripe payments to email receipts—is working smoothly.
Got questions? Drop them in the comments. I’m happy to help.
TL;DR — How to Add Stripe Donations to WordPress
- Install WP Full Pay
- Connect your Stripe account
- Build your form and set donation amounts
- Customize layout, fields, and appearance
- Copy and paste the shortcode into a page or post
- Test everything before going live
Let donors support your cause with just a few clicks—and make it look good while you’re at it.
Learn more


0 Comments